Showing posts with label Crazy quilt. Show all posts

Friday, December 14, 2012

A wine gift bag for every occasion.

Each time I am invited to lunch or dinner at friends or my family, I always take with me  a bottle of wine as a gift, I think here in Quebec is the tradition (I do not know if I ever told you that my country of origin is Uruguay, I'm living in this beautiful country for the last 23 years). Returning to my theme, whenever I have the opportunity I will sew a gift bag, and each time the recipient of my bottle of wine left in admiration with the bag (do not even look at the bottle of wine) the truth is that  over the years I have made wine gift bags for all occasions, I'll just adjust my fabric selection by the event and the imagination does the rest. I thought it might interest you to see how I make my wine gift bags and here is the tutorial.


This is an easy project to do, you can do it in an afternoon and the possibilities are endless. Everything will depend on the fabric used for the outside of the bag, you can do something simple by using a print fabric or make something more elaborate such as adding an applique, an embroidery, buttons, eventually all your ideas can be used to decorate the fabric.


What we need is:
Cut:   13.5 x 13.5 from main fabric, lining and batting

Base: the pattern is here, you will cut, 1 from fabric, one from batting and one from lining. ( When you print the pattern, verify that the diameter of the circle is 4 ")
Handle: Cut a piece of 4" x 17".

I decided to make the outer fabric using fabric scraps, I think you are getting to know me better, I have to admit...  when I use my scraps, I feel happy :)
To create my piece of fabric I follow the same steps I did when I made my crazy quilt clothespin bag, here is the tutorial,


All started this way
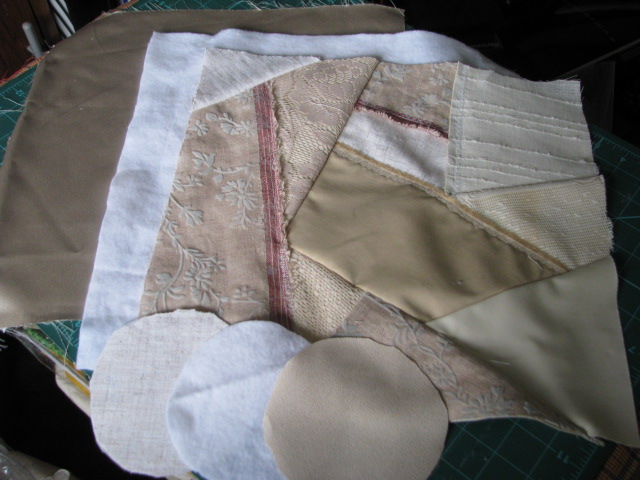


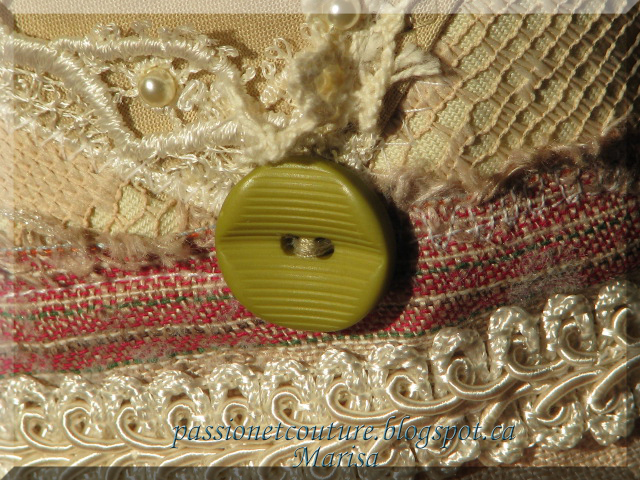
From here I started to add more details,  add buttons, beads, lace and decorative stitches...


Once I finished all the embellishment of my piece of fabric I did the handles.
If you do not want to sew handles another possibility would be to make buttonholes,
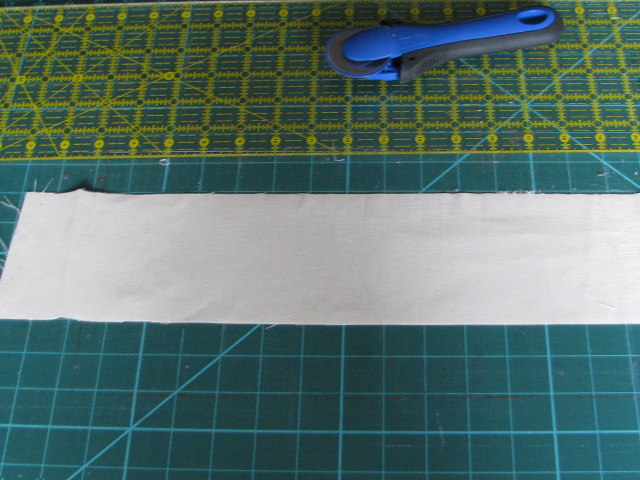

Once the piece of fabric cut to 4 "x 17"
 
Fold in half lengthwise with wrong sides together
 

Open and fold again each long edge in, to meet the center and press


fold again, press and edge stitch both edges


Pin the handle to the right side of the fabric ( I put the handle 3 "from the
edge), align the row edges of the handle with the row edges of the fabric.


With right sides together, fold the exterior fabric lengthwise in half and  sew.
 
 
before adding the base, place the base batting and the  wrong side of the


This is a photo of another gift bag I made, here you can see better the stitching I did
to attach the batting to the outer fabric
 
 
Now let's sew the exterior fabric  to  the circular base. With right sides together
pin the base to the exterior fabric and sew, using a 1/4" seam allowance.


Turn right side out


Now let's do the lining, we will follow the same steps as we did for the entire
exterior of our bag, but this time leaving 4" of the side open.


 Let's join the exterior and the lining, with right sides together, aligning the row
edges, the handle will be sandwiched between the exterior and the lining, pin and
stitch around the top edge.


Now is time to  pulling the exterior fabric through the opening
 
 
Now we sew the opening  and push the lining inside of the  wine bag.


The wine gift bag is finished, now we just have to go and buy a bottle of wine, to
fill our wine gift bag and give it to a loved one, it is certain that this will be
an appreciated gift.
"Please do not count all the times that I wrote the word "wine" in this tutorial"
 

I want to  share with you some extra photos


More wine gift bags I made


I hope you enjoyed this tutorial and  don't forget to leave me comments, you know
that your comments feed my desire to create.
 
If you are reading this post and you're not a follower, why not consider to join
us? I'm sure you will spend some  beautiful moments with us on the blog. I'm always
looking forward to making new bloggy friends!
Have a happy sewing day!
 
Marisa
I'm linking this project to Creating my way to Succes(A Round Tuit 132) , Threading My Way, Petals to Picots, Skip To My Lou, Freemotion by the River, A Quilter's Table, and to Fabric Bows and More
I'm also linking this project to The Creative Blog Hop ( dolly's designs).

Monday, December 3, 2012

My Christmas table runner.

We are in the month of December and I started to prepare my home for Christmas.
I want to show you this table runner that I made a couple of years ago and that
decorates my table every December since.


 To make this table runner I used my embroidery machine and the embroidery card
"Crazy Patch Embroidery" from Husqvarna ( Embroidery disk number 130).
To do it, I chose one of the pictures of the card and I embroidered several times, always repeating the same pattern and
using the same colors of fabrics. Then what's left to do is sew them together to
create the design.


Hope you like it and that I have given you the inspiration to create one like this
for your home, or maybe make one to give to a loved one.


Have a happy sewing day!
 
Marisa.

I'm linking this project to Creating my way to Succes(A Round Tuit 130), Sew Chatty, and to  Skip To My Lou. 

Tuesday, August 7, 2012

How to sew a crazy quilt clothespin bag.

Finally I can share photos of my clothespin bag with all of you, I just want advise you that the clothespin that you see in the pictures is longer than the previous one I showed in my previous publication.


I will upload pictures of the two for you to understand. What happened was that
when I finished sewing the first time the clothespin, I found that it was not long
enough, here are the photos:

This is before

This is after

It was at  the end that I decided to do it longer so,  it took me a few more days to finish this
project, now the clothespin measures 16.5 "and is large enough for all my
chopsticks.

Now that this is explained, I can start with the tutorial
In my previous post I shared with you all the steps that I did before starting to
sew my project. Click Here for the first part of the tutorial. Today I will share with you some photos I took during the creation of my project.

Once I finished drawing my pattern, I began to create my crazy quilt,
and I used the technique which I explained in this tutorial, but I'll show some
stages that I did.

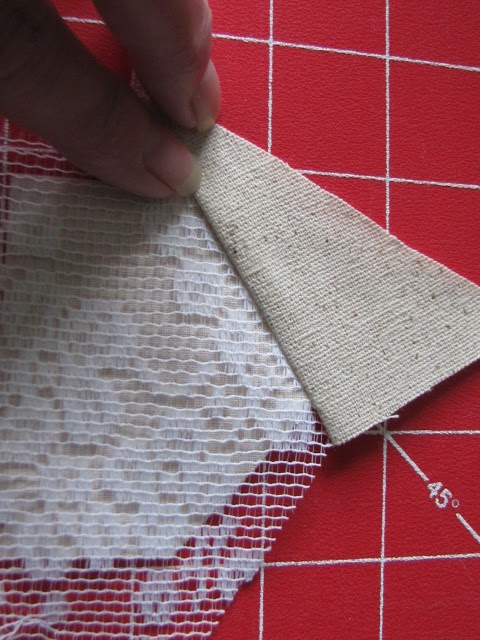
To begin  I cut a 5 sided piece of fabric, and a piece of lace, put one over the
other.


Then I used my technique, SEW, FLIP, IRON and CUT the surplus of fabrics.
I'll show what I mean, I cut a second piece of fabric and I will place this piece
on top of the first piece, wrong sides togheter.


sew using 1/4" seam allowance and trim to obtein a straight edge

Flip the second piece of fabric over to conceal the seam and expose the right side
of the fabrics, and iron.

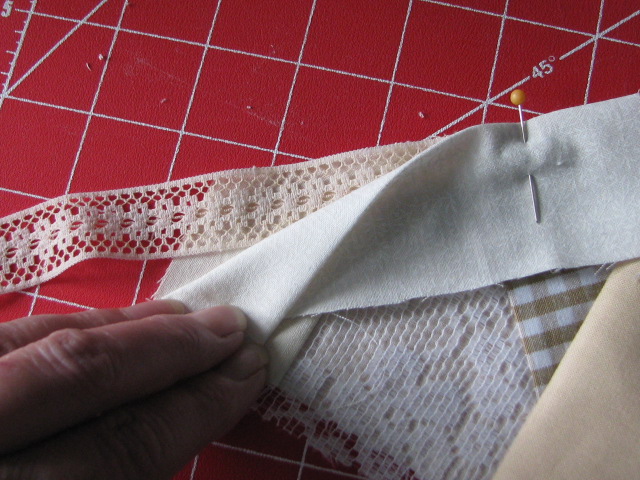
cut another piece of fabric and repeat the same steps, if you want to add a piece
of trim, what we do is position the trim and match the edges


add another piece of fabric on top of the trim, match the edges one more time

and sew, flip, iron and cut the excess of fabric.
For questions about this technique I invite you to read the tutorial with every
step that I published previously and that is *here*

I put together my crazy quilt in this way, adding pieces of fabric each time and
sometimes adding a piece of lace or trim


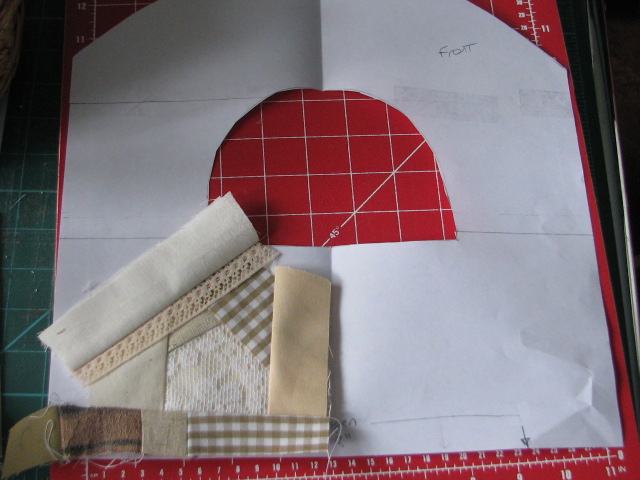
Every so often you have to go checking the form that is taking this crazy quilt, to
see how it's going on, to do this I will  put the crazy quilt fabric, on my
pattern, this allows me to see where I have to keep adding fabric.


I created several pieces of crazy quilt and I'm going to put them together later.


When all the pieces are joined, it will look something like this


I put the  pattern paper on the fabric and cut, the center and the outer edge.


Now I have a more nice pattern to work on.

I started to make the embellishment, to do that I made a sandwich with a layer of
stabilizer first, then a layer of batting and finally the fabric, I added decorative stitches,
crochet flowers and buttons.


To finish the front, I cut a piece of lining with the shape of the pattern, I put
the wrong side in front of me, put the crazy quilt on the lining and I finished the
part where the hole is, using a piece of trim that I sewed all around it.


The back side of the front panel it looks like this


Then I prepared the back side of the clothespin bag, I placed a piece of backing
fabric, batting and the outer fabric,


and sewed together using a running stitch

I added a bit of trim on the top of both sides to hide the hole where it will come
out the hanger
                                       

To continue I placed the front and back, right sides together and sew the two
pieces together using a ¼” seam allowance, leaving about 8 "unstitch  at the
bottom, to leave enough room to get through that space the hanger,


and I also leave without sewing the upper side where I added the trim.


Then slide the hanger through the space we had left open

What remains now is to hand sew the bottom

So I ended my first version of this project

Then, I lengthen as I told you in the beginning, because I did not have much room
for my sticks!!!


Here I'll  share with you more pictures I took, I liked this project so much that I've
taken a few pictures from all sides, top, bottom, middle, if there are many I
apologize, I could not resist!!!


Here ends this tutorial, I had great pleasure in creating this clothespin and also
in creating this tutorial to share with you all. I hope you liked it, if there were
spelling mistakes, I apologize, I tried to do the best I could.

I hope you enjoyed this tutorial, I always appreciate your comments and I always hope that this blog continues to grow with new followers, do  not hesitate, you are welcome!!
 
I'm linking this project to Positively Splendid , Creating my way to Succes, and to Threading My Way, Quilting and Patchwork ~ Link Party.
 
Have a happy sewing day!!!!!
Marisa


LinkWithin

Related Posts Plugin for WordPress, Blogger...