Showing posts with label bags. Show all posts

Thursday, September 11, 2014

Repurposing an old pair of denim to a bag.

With great joy and enthusiasm I am again in this beautiful world of blogger. The summer has gone so fast, I have not had time to do what I like ... share my creations with you  and visit my blogger friends.
I  was knitting, crocheting and sewing. I have several projects in my camera, and I'll upload them to the blog in the coming days
Today I want to show you my new bag, I made ​​it from an old pair of denim.


I did it with the idea of selling it, I always have this dream of opening my Etsy shop, hopefully I can make that dream this year.
At the end of the photos, I'll give the link to a You Tube video that helped me make this beautiful bag. What you will need is a pair of jeans, a shirt and a bit of inspiration.
Here are the photos I  have taken  today to share with you, I hope you like them!


If you want more ideas for recycling jeans, my bloggy friend Pam from Threading my way's blog wrote a post in which there is a beautiful variety of projects, with much honor I can tell you that you will find three of my tutorials.
 
Here is the link to the post.


Con mucha alegría y entusiasmo estoy otra vez en este hermoso mundo de blogger.
El verano ha pasado  muy rápido,  no he tenido tiempo de hacer lo que mas me
gusta...compartir con ustedes mis creaciones y  visitar mis amigos bloggers.

Estuve tejiendo, haciendo crochet y también costura. Tengo varios proyectos en
mi cámara  de fotos,  y los voy a subir al blog en los próximos días.

Hoy les quiero mostrar a ustedes  mi nuevo bolso, lo hice a partir de un viejo par de jeans.


Lo hice con la idea de venderlo , yo siempre tengo ese sueño de abrir mi Etsy
shop,  ojala  ese sueño  lo pueda realizar este año.
Al final de las fotos,  les daré el enlace hacia un video de you tube que me
ayudo a confeccionar este hermoso bolso. Necesite un par de jeans, una camisa y
un poco de inspiración.
Aquí  van  las fotos que tome hoy para compartir con ustedes, ojala les  gusten!
 
Si quieren mas ideas para reciclar jeans, mi amiga Pam del blog Threading my
Way escribió  una publicacion en la  cual hay una hermosa variedad de proyectos, con
mucho honor les puedo decir que ustedes encontraran tres de mis tutorials en su publicacion.
 
El enlace hacia el video en You Tube esta AQUI


Les deseo un hermoso dia, les agradezco por su visita y espero con muchas ganas
sus comentarios.


I wish you a nice day, thank you for your visit and am looking forward to
your comments.
 
Have a happy sewing day!
 
Marisa


I'm linking to Crafty Allie Pinterest Party and Threading My Way( bags and totes link party).
I'm linking also to Patchouli Moon Studio, The button to visit the party is at the end.


Patchouli Moon Studio's Weekend Link Party

Friday, January 24, 2014

The Sling Bag...is a free pattern!

 
I want to show you my new creation!
 
Les quiero mostrar mi nueva creación!


Some elements were necessary in order to make it, a pattern and a designer who 
allow me to change its pattern, a pair of jeans and my imagination.
I was lucky to be part of Samantha's pattern testers because this time Samantha 
gave us freedom to modify her pattern, it was then, that I decided to recycle a 
pair of jeans.
 
Samantha is a wonderful designer; you can find her on her blog At Home with Mrs.  H, where she shares with us interesting articles, sewing tips, and much 
more.
 
Good news!!! The pattern is free and I'll give you the link at the end of my 
post.
 
 
Varios elementos fueron indispensables para hacerla, un patrón  y una diseñadora
 que me permitiera modificar su patrón,   un par de jeans y mi imaginación.
 
 
Estoy contenta de formar parte del grupo de personas que prueban los patrones 
de Samantha en particular esta vez,  pues   Samantha nos dio libertad de 
modificar su  patrón, fue así que yo decidí  transformar un par de jeans en un 
bolso.
 
Samantha es una magnifica diseñadora, ustedes la pueden encontrar  en su blog
At  Home with Mrs H, donde comparte con nosotros artículos interesante, trucos de 
costura,  y muchísimo  más.
 
Este patrón es gratis y les dejare el enlace al final de mi post.

Todo comenzó con este par de jeans.


It all started with this pair of jeans.
 
About the pattern:
I added 2" to the length to  the pattern Top pattern.


Acerca del patron:
 Lo primero que hice fue agregar 2 pulgadas a la parte superior del patrón A.


Then position the pattern on the jeans to determine the length needed to make 
the bag.


Luego posicione el patrón para determinar el largo que necesitaba para hacer el 
bolso.


On the back I drew the cut lines, one in the middle of the leg and another   to 
determine the length I needed.


En la parte de atrás yo dibujé  las líneas de corte, una en el  medio de la 
pierna y la otra linea para determinar  la parte de arriba.


Here I show you pictures of the section I cut and how I have positioned the 
pattern.


Aquí les muestro fotos de la sección que corté y como posicioné el patrón.


Then I followed the instructions of the pattern, up the time when we need to 
attach the side tabs.
 I placed my tab 5 " from the top and I also moved the tab about 3" from the 
side, I hope that with my picture you will understand!


Luego fui siguiendo las instrucciones del patrón, hasta el momento en el cual 
tenemos que colocar las pestañas de los costados ( the side tabs) yo las 
desplace y las coloque a 5 pulgadas del borde superior y las corrí hacia el
frente del 
bolso, más o menos 3 pulgadas de las costuras laterales. Espero que con la foto 
lo vean todo más claro.


Then I followed all instructions to the end.


Luego seguí con todas las instrucciones hasta el final.
 
 
 In the end I decided to make a flower to give a focal point, I used the same 
fabric as the inner lining to keep the same theme in the colors.


 Al final decidí hacer una flor para dar un punto focal, usé la misma tela que el
 forro interior  para guardar el mismo tema en los colores.


Here is the final result!
Aquí está el resultado final!


Make this bag was an experience that gives me a great pleasure.
Something else... this pattern is free, Samantha generously shares it with us 
and it's available for download now, only from Craftsy. Here is the link.
 
It is a pattern created for beginners, where you can learn various sewing 
techniques, how to create a zipped pocket, how to sew a slip pocket, how to 
install a magnetic snap and how to do an adjustable strap.
I would advise you to visit Samantha's blog, here is the link, and you will be
able  to see the creations that has been made by other testers and also my bag.
 
I hope you have enjoyed this post and that you liked my recycling project,
transforming old jeans in an original bag.


Otra cosa este patrón es gratis, Samantha lo comparte generosamente con nosotros
 y lo pueden obtener aquí en su Cratsy store.
Se trata de un modelo creado para los principiantes, donde se puede aprender 
diversas técnicas de costura, cómo crear un bolsillo con cremallera, cómo coser 
un bolsillo, cómo instalar un broche magnético y cómo hacer una correa 
ajustable.
Yo les aconsejo visitar el blog de Samantha, aquí queda el enlace, allí podrán 
ver las creaciones que han hecho los otros testers.
 
 
Espero que hayan disfrutado de este post y que les haya gustado mi proyecto de
reciclaje,  transformando viejos jeans en  un bolso original.


Nos vemos pronto.
 
See you soon!!!
 
 
Marisa :)
(One day I will create a beautiful signature to my posts)
(Un dia voy a crear una linda firma para mis publicaciones)


 I'm linking this bag to Fluster Buster and Crafty Allie .


Fluster Buster

Friday, September 27, 2013

The Little Bow Pleat Clutch and a pattern giveaway !

Some time ago I discovered a beautiful designer, her name is Samantha , from the
blog "At home with Mrs H", I discovered her blog through a dear bloggy friend
Maria from Mia's Creations and since then I always wanted to be a tester for
Samantha!!!
 
 
Today I'm writing a special post,because
I had the joy of being accepted into her group of testers and here I show you  
the new model just released by At home with Mrs H.... this one, was tested by me.


Hace algún tiempo descubrí una hermosa diseñadora de carteras, su nombre es
Samantha, del blog "At home with Mrs  H", descubrí su blog a través de una gran
amiga, su nombre es Maria del  blog  Mia's creations y desde entonces siempre
quise ser tester de los bolsos de  Samantha!
Hoy voy a escribir un post especial, les quiero contar que he tenido la alegría de ser aceptado en su grupo de testers y aquí os muestro el nuevo modelo que acaba de publicar "At home with Mrs  H" ... éste es el que yo hice.


This little bow pleat pattern is beautiful, Samantha explains very well the
different steps to make this bag, inside this little bag there is a pocket with
a zipper. And while I  haven't added handles, in the pattern you will find the 
explanations for those wanting to add handles. Everything is there.
 
 
The finished bag measures approximately 8.5" x 6.5" (21cm x 16.5cm) and features mitred corners, a cute bow with a pleat cascading down from the centre and a magnetic clasp closure.


Este  patrón es simplemente  hermoso, Samantha explica muy bien los
diferentes pasos para hacer este bolso, dentro de este pequeño bolso hay un bolsillo con una cremallera. Y aunque yo no he añadido asas en mi bolso, en el patron ustedes encontraran las explicaciones  para aquellos que estem interesados en  añadir asas. 
 
La bolsa terminada mide aproximadamente 8.5 "x 6.5" (21 cm x 16,5 cm) y cuenta con esquinas cuadradas,  un pliegue en cascada desde el centro y cierre magnético.


I have to thanks Samantha  because of her  generosity, she has allowed me and
her testers to do a giveaway of her new pattern, after having chosen a winner, she's going to send the pattern for free.
 
Tengo que agradecer a Samantha por su generosidad, ella me ha permitido a mi y a todos
sus testers de hacer un sorteo para ganar  su nuevo patrón, una vez elegido el ganador  ella les va a enviar el patron  sin costo.


....surely you are wondering
Seguramente ustedes se estan preguntando
 
 
1)Who can participate?
Quien puede participar?
 
All people around the world who come to my blog, can participate. No need to be
a follower of my blog, but if you are a follower, or if you follow me by email
you  will have an extra entry.
 
Todas las personas de todo el mundo que vienen a mi blog, pueden participar. No hay necesidad de ser un seguidor de mi blog, pero si usted es un seguidor, o si me sigues por correo electrónico usted tendrá una oportunidad  adicional.
 
 
2) How to enter:
Como participar
 
In order to enter the giveaway I'll ask you to leave me  a comment, here comes
the interesting part, if you are a follower, let me another comment to let me
know that you are a follower of this blog, this gives a second entry, and if you
follow me by email, leave another comment for a 3rd entry.
Only 3 entries per person
 
For those of you who don't know how to comment, please click where it says
comments at the end of this page. It will open a window, then  in the lower part
of this window, you will find the space where you can leave the message.
 After writing your message you must "Choose an identity" and then you will be
able to "Publish your comment".
 
 
Contact info:Please make sure that I can contact you if you win, if you are not
a follower, leave your email with your comment!If you are a blogger, please
check that you are a reply blogger. If  I can't  contact you, I will have to
choose another winner.


Para entrar en el sorteo yo voy a pedir que me deje un comentario, aquí viene
la parte interesante, si usted es un seguidor, me puede dejar otro comentario para dejarme saber que usted es un seguidor de este blog y  esto le da una segunda entrada al sorteo, y si me sigue por correo electrónico, me puede dejar otro comentario para una  tercera entrada.
 Sólo 3 entradas por persona
 Para aquellos de ustedes que no saben cómo hacer comentarios, por favor haga clic en donde dice "comments" al final de esta página. Se abrirá una ventana, y luego en la parte inferiorde esta ventana, se encuentra el espacio donde se puede dejar el mensaje.
 Después de escribir su mensaje debe "Elegir una identidad" y entonces será capaz de "Publicar un comentario".
 
Datos de contacto: Por favor, asegúrate de que yo pueda ponerme en contacto contigo  si ganas, si no eres un seguidor, deja tu correo electrónico con tu comentario! Si eres un blogger, por favor comprueba que te puedo responder. Si no puedo contactar la persona ganadora, tendré que elegir otro ganador.


3) When does it end?
Cuando se termina ?
 
You can participate until Thursday October 3 and I will announce the winner on
Friday, October 4.
 
Se puede participar hasta el jueves 03 de octubre y voy a anunciar el ganador en
Viernes, 04 de octubre.


Wait a minute, please do not go yet I have still more things to tell you. If you
have interest in this pattern, you still can visit the other testers as they are
also doing the giveaway of this pattern, you will find all the testers that have
participated at Samantha's blog, click here
 
 
If you've already purchased the "Bow Pleat Pattern" tote before and you are
interested now in this pattern "The little Bow Pleat", Samantha is offering this
pattern as part of a discounted price 2 pack with the regular bow pleat tote.
 The link for the 2 pack is here
 
"IF ANYONE HAS ALREADY BOUGHT THE BOW PLEAT TOTE,  YOU CAN CONTACT SAMANTHA  VIA
Her  ETSY STORE FOR A DISCOUNT CODE TO GET THE LITTLE BOW PLEAT AT THE REDUCED
PRICE SO YOU DON'T MISS OUT ON THE 2 PACK PRICE"


Un momento, por favor no te vayas todavía.... tengo todavía más cosas que
decirte. Si tienes interés en este patrón, y quieres tener mas oportunidades para  ganar,   puede visitar los otros testers, ya que ellos
 también hacen un giveaway  de este patron, para encontrar todos los testers que
estan participando haz  click aqui

Si ya has comprado el patron Bow Pleat Pattern  antes y a ti te
interesa ahora  este patrón de The Little Bow Pleat, Samantha está ofreciendo
este
patrón como parte de un precio de paquete con descuento , tienes que visitar su
etsy shop y dejarle un mensaje para que te de un codigo de reduccion del
precio....espero que esto este claro...es para aquellos que han comprado
anteriormente el primer patron.
El enlace hacia el etsy
 
 
For those of you who can't wait to win the giveaway and want to buy it to begin
this beautiful clutch bag today, the pattern is listed and up for sale here.
shop esta aqui.
 
Para aquellos de ustedes que no pueden esperar a ganar el sorteo y quieren comprarlo para ya empezar a hacer esta hermosa bolsa hoy mismo, el patrón está en venta aquí


Good luck to all ... I look forward to your comments!!!
 
Marisa :)

Tuesday, August 6, 2013

The Wavy Top Tote.

My daughter is in love with the zebra print, and I know it because  I've painted zebra
print bands using a stencil in her room , I also made photo frames using the zebra print as
image.....So the perfect accessory for her, has to be a bag with a fabric that
has a zebra print. Yes, that is a good idea... so I made ​​this bag to her, she is
in love with the bag and I I'm happy to see that she liked so much.
 
 
Mi hija esta enamorada del zebra print, en su cuarto le he pintado bandas de
zebra print usando un stencil, también le preparé marcos para  fotos  y usé  el
zebra print como imagen. Considerando todo eso el accesorio perfecto para ella, 
tiene que ser un bolso hecho con una tela que tenga un zebra print. Si, eso
es... y le hecho este bolso a ella, ella esta enamorada de el bolso y yo  estoy
feliz de ver que a ella le ha gustado tanto.


You can find the pattern for this bag in Bethany's blog. She has written the
tutorial to make this bag into  several parts,  and while she has created two
varieties of her bag,I made a third version......  this time I did not add
pockets to the outside and I really like how it looks.
Click here to go to Bethany's blog, Sweet Bee Buzzings's blog.


Ustedes pueden encontrar el patrón para realizar este bolso en el blog de
Bethany. Ella a escrito el tutorial para hacer este bolso en varias partes y si
bien ella ha creado dos variedades de su patrón, yo hice una tercera variante, 
esta vez yo no agregué bolsillos al exterior y me gusta mucho como me ha
quedado. 
Si quieren visitar el blog   de Bethany  ( Sweet Bee Buzzings's blog )y obtener el  tutorial,  hagan click aquí 


If you want to see pictures of my first Wavy bag, they are here. 
 
Si quieren ver fotos de mi primera Wavy bag, estan aqui


Here in Quebec it's summer and the flowers in my garden are in full explosion of
colors. Normally I do not post pictures of me, but I want to share with you this photos,
the colors of these flowers really inspires me.
 Thanks for your visit, I hope you liked my purse and that you enjoyed this
post.


Por aqui en Quebec estamos en  verano  y las flores de mi jardin estan en plena
explosion de colores.  Normalmente no pongo fotos mias , pero quiero compartir
con ustedes esta foto, los colores de todas estas flores me inspira realmente.
Gracias por vuestra visita , espero que  les haya gustado mi bolso y  que hayan
disfrutado de este post.


See you soon :)


Nos vemos pronto:)

 
Marisa


Saturday, March 16, 2013

Let's talk about bags.

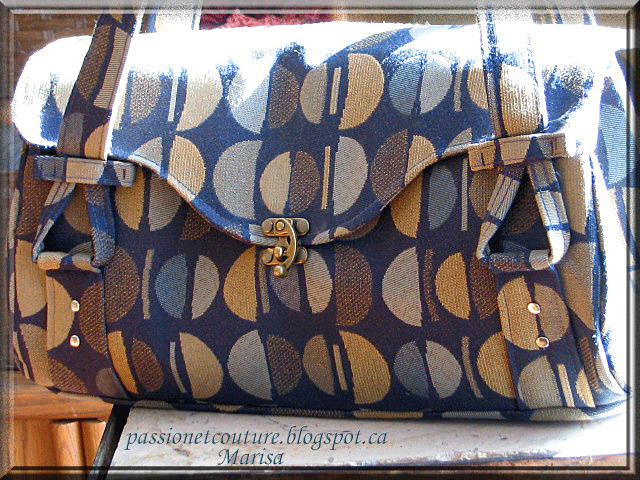
Today I want to show you a bag that I finished a few days ago, I  don't  know if you recognize the pattern, is the Blossom Handbag from Amy Butler


I've done this pattern before,  I love the shape of this bag, the spacious
 interior  and especially the pockets, that's why whenever I have a chance,
I go back to make a bag with this pattern.


This time , I was looking for a special touch so I added a metal closure.
and rivets.


I did the bag using the book  "Amy Butler's Style Stitches". In this book,
Amy shows us 26 wonderful bags that we can create. If you want to do this
bag , without buying the book, you will find a free pdf tutorial here.
The  tutorial is on the Sew Mama Sew's blog is a free pdf that can be
downloaded.


I bought my book from Amazon, the link is here and once there, you can
look at some of her projects  inside the book. I just want to clarify that I
have no affiliation with Amazon. 


 Satchel Bag Pattern Giveaway


As we are talking about handbags, I have more news to share with you, I 
want to let you know  about a Satchel Bag Pattern Giveaway that is hosting
ASG in the SLC. The pattern was created by Samantha from At home with
 
 
 This is the Satchel Bag Pattern:


 Maria was a tester for this pattern and she  has done a nice job with this
bag, while visiting Maria's blog you will find also the links to the other blogs
that are also hosting this giveaway, which means more chances to win this
pattern.


Bag Loving Blogs Blog Hop!


I have more greats news to share with you, this information will bring
happiness to those of you who like to sew bags, this time was while
visiting  Nissa's blog, that I learned that Chris from ChrisW Designs
has started   a blog hop link party of Bag Loving Blogs.
I added my blog to the blog hop, I think it will be a great way to keep in
touch with those blogs that have the same passion that we have ....
 sewing bags!!
 
 
Here's the instuctions from ChrisW to ​​participate in this blog hop:
 
 
Step 1) Just add your blog link below by clicking on the "Click here To Enter" link and follow the easy steps to add your blog!
 
*Step 2) IMPORTANT! Click on the "Get the code here" link shown to grab your copy of the code and add it to your blog! Please include these instructions so that new members will know what to do! :)


*Step 3) Grab this button: (Right Click and Save)

and pop it in your sidebar linking to your Bag Lovin Blog Hop post so that we can leave this blog hop open and people can keep finding it and hopping on! :)
After all 3 steps have been completed, your link will be approved and added to the blog hop! :)
That's it! :)
 
  (Please note links now require approval due to spamming :( so will be approved after all 3 steps have been carried out! Please make sure your blog has posts about BAGS!)


Hope you enjoyed this post and you have found it informative.
I always look forward to your comments and always gives me joy when I come to see my blog and find a new follower here!
Have a nice day!


Thursday, February 7, 2013

Let's make a Shopping Bag for Valentine's Day


I just finished this shopping bag a few days ago, I've done this kind of bags before but this time I took pictures to share with you the tutorial.


Actually I don't know whether to say Shopping bag or if there is another
name for this type of bag, the fact is that is a bag unlined but where the
interior is neat, to achieve this I used the French seam. It is a bag that
is quick to make, is practical, and we can carry this practical bag in our
handbag.
 
 
There are two ways to do it, either by cutting two fabric rectangles or one.

First you have to determine the final measure of your shopping bag, my
shopping bag measures 13 "wide by 17" in length. If these measures are
appropriate to you, then you can follow the steps that I used in my
tutorial, but I want you to know that with my explanations you can make a
shopping bag with the measure you want.


1) Cutting the fabric
 
If we do it with a single rectangle of fabric


a) The width
 
The width of your bag +1"
 For  my shopping bag, my final measure is 13" +1" = 14 "
 
b) The  length
 
the length of your bag, two times + 4"
My measures , 17"+ 17" + 4"= 38"
 Briefly I will cut a piece of fabric of 14 "x 38"


If we do it with two rectangles of fabric
 
a)The width
 
The width of your bag +1"
My final measure, 13" +1" = 14 "
 
b) The  length

The length of your bag + 3"
In my case, 17" + 3"= 20"
I will cut two rectangles of fabric that measure 20" x14"
 
 
2) Ironing the top edge
 
Fold the top edge 1" down, iron, fold again and iron.
Leave as it and move to the next stage.


3) Sewing ( the French seam)
 
Lay your fabrics wrong sides together  matching raw edges.
Do not forget to open the top edge that we had previously ironing, I just
ironed it for future reference later, when I will do the sewing of the
straps, make sure that all the raw edges matching!!
Pin edges together and sew with 1/4" seam, then trim seam allowance to
1/8", don't cut into your stitches, press.

 
I decided to use my serger


4)Turn inside out

Turn the bag inside out , now  the fabrics will be right sides together,
press and stitch in a 1/4" seam,  you have to enclose the trimmed seam
allowance. Since I decided to use a serger, I have no need to trim the
edges


I want to share a tip with you , look at this photo, is the Edge Stitching
Foot, this is a foot that I use regularly. This foot has a flange on the
side for guiding the fabric, we just have to adjust the needle position and
we will get perfect seams along the edges of the fabric.In this case I
position it to sew, to 1/4'' from the edge.
 
 
I have to confess that I use this foot  all the time !
 
(Back to our project) 
Turn the bag right side out.
I cut two straps of 21 ", and fold at 3/4" from the edge.


Now the explanation it will be easier with the photos, remember that we had
ironed the top edge twice, ok, now that the french seam is finished, we will
re-fold the top edge twice and secure it with pins.


The next pictures will show you , how I put the straps on the top edge:


I put the straps 3 "from the sides
 
 
Once both straps are fastened to the front and the back, we will sew.


While this shopping bag is easy to do, try to write a tutorial for two ways
to do it, it  was a bit difficult for me. I added several photos to help you to
understand, hope I succeeded!
 
These shopping bags were a commission for the deaf center who frequent my
parents, that's why I embroidered the letters of the sign language. They
are red because they are a gift to people who frequent the center, on
valentines day.
I decided to give them a festive touch and made ​​some tags to decorate them.
 
 
I do not want to bore you with more explanations, but I want to share with
you the way I did the tags, here are photos I took , I think it will give
you an idea about the steps that I did.
To begin, I used the corrugated board, which comes in boxes to protect
fragile materials and here you will see the steps...


In the other hand ,I'm having fun with my memories scrapbooking software, I
made another photo montage.
Do not forget that the giveaway for this software remains open until
February 13, it is so easy to use and when it's free why not take
advantage?
 
 
The link where you will find the information  for this giveaway is here.
 
 
I hope you enjoyed this tutorial, I tried to do the best I could. If there
are spelling mistakes, I apologize, I also tried to do my best, my first
language is Spanish and I learn English with all of you.
I look forward to your comments.
Have a nice day!

Marisa :)


LinkWithin

Related Posts Plugin for WordPress, Blogger...