
After a week, it is only today that I have been able to raise this second part of the tutorial.
Prepare the post it takes time, especially when it's a tutorial.
Maybe you're not going to believe me, but every time I write a post, the first thing I'll do is write all my text in Spanish and then, translate it into English.

In my previous post that you'll find it here, we finished the exterior of the tote and the handles. Also in another previous post, I showed how I made the fabric flowers, the link is here. Today we will continue with the rest, that is, make the lining and see how we do to attach the lining and the handles to the outer fabric of the tote.
Create a label
Before we start I want to tell you something, one of the things that I was trying to do last week was, make labels to add to my projects, I made many tests, I took several photos and I have the intention to prepare a tutorial to show you how to do custom labels.
Today I'll show you what I decided to do, although I created several varieties of labels, after several attempts, trying to make labels for this tote, I decided to do a transfer of my label directly to the fabric, instead of making the transfer to a ribbon and then have to sew it into the tote.
Today I'll show you what I decided to do, although I created several varieties of labels, after several attempts, trying to make labels for this tote, I decided to do a transfer of my label directly to the fabric, instead of making the transfer to a ribbon and then have to sew it into the tote.
Look how it turned out.

Prepare the lining
The liner measures the same as the outside, for my tote I used the following
measures:
I cut
1 (14 x 36" ) exterior fabric, so...
1 (14x 36") for the lining.
The lining can be made simple without pockets.
For my tote I decided to add two
types of pockets, on one side, I added a pocket with a metal closure.

On the other side I did something simple like this.

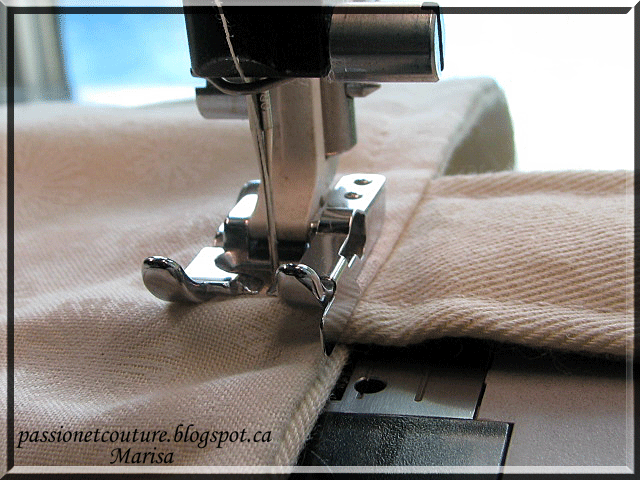
Pin lining right sides together, aligning row edges and sew together, leaving
7" of one side open
Don't sew the upper side

Attach the handles to the exterior fabric
In my previous post we saw how to do the handles, I finally cut them and the
final measure is 27 "long,

At this time, I'll put the two handles on the right side of the tote.
Usually, at this moment, I'll sew by hand the handles , I use basting stitches, just to be sure that they will not move on the next steps.
With right sides together place the exterior fabric, inside the lining.

Aligning the row edges, pin, and sew together
sew along the top edge of the tote, I did several rounds with the sewing
machine, a first seam 1/2 "from the edge, other seam closer and another 3/4"
from the edge. This part is where you have the handles and it must be really
hard.

Turn right side out by pulling the exterior fabric through the opening


We have to sew the opening by hand or with the sewing machine.


Place the lining inside the tote, and topstitch through all layers!


Add the fabric flowers
At the end I added the flowers fabrics, I could not decide which one.


I finally decided to add the two, the back side of these flowers have a brooch,
so that we can put one or the other, according to the mood of the day.

We did it!

I want to tell you something, I have wanted to open an Etsy shop for a while, I
said to myself that if I could create 10 items I will do it, ok this is just the first.
This ruffle tote is my first item for my future Etsy shop, yes!!!

I just hope that my dream comes true this year!
I would like to do, necklaces, bracelets and wool accessories such as hats and
scarves. I have a goal, I have ideas , but what I'm missing is always time!!!
But there is always a beginning and for me to have finished this ruffle tote is the beginning, I have other projects already begun, apart from a number of ideas that I'll share with you all ,
in the next posts.
For today, I just wish that you have enjoyed my explanations, I tried to do the best that I can.
I will be waiting anxiously for your comments, it is a pleasure for me to read every one of your comments! Thanks for your visit, I hope you come back soon!
Greetings to you all.
Enjoy!
Marisa.
I'm linking this project to Mod Vingtage Life, Creating My Way to Success, Threading My Way , Sew Many Ways, Dolly's designs ( The Creative Blog Hop), The Chicken Chick, One Artsy Mama( Shine on Friday) , Sew Chatty ( Made With Love), Pieced Pastimes, All Things Pretty , Petals to Picots, Dear Creatives, Happy Hour Friday, Crafts a la mode, Inspiring Creative Moments and Sew Crafty Angel .
I'm linking also to Plucky's Blog Hop , Night Owl Venting ( Blog Hop) , My Turn ( for us) , Fun Friday Blog Hop, The Pin junkie and Let's get Social Sunday.
Place the lining inside the tote, and topstitch through all layers!
Add the fabric flowers
At the end I added the flowers fabrics, I could not decide which one.
I finally decided to add the two, the back side of these flowers have a brooch,
so that we can put one or the other, according to the mood of the day.
We did it!
I want to tell you something, I have wanted to open an Etsy shop for a while, I
said to myself that if I could create 10 items I will do it, ok this is just the first.
This ruffle tote is my first item for my future Etsy shop, yes!!!
I just hope that my dream comes true this year!
I would like to do, necklaces, bracelets and wool accessories such as hats and
scarves. I have a goal, I have ideas , but what I'm missing is always time!!!
But there is always a beginning and for me to have finished this ruffle tote is the beginning, I have other projects already begun, apart from a number of ideas that I'll share with you all ,
in the next posts.
For today, I just wish that you have enjoyed my explanations, I tried to do the best that I can.
I will be waiting anxiously for your comments, it is a pleasure for me to read every one of your comments! Thanks for your visit, I hope you come back soon!
Greetings to you all.
Enjoy!
Marisa.
I'm linking this project to Mod Vingtage Life, Creating My Way to Success, Threading My Way , Sew Many Ways, Dolly's designs ( The Creative Blog Hop), The Chicken Chick, One Artsy Mama( Shine on Friday) , Sew Chatty ( Made With Love), Pieced Pastimes, All Things Pretty , Petals to Picots, Dear Creatives, Happy Hour Friday, Crafts a la mode, Inspiring Creative Moments and Sew Crafty Angel .
I'm linking also to Plucky's Blog Hop , Night Owl Venting ( Blog Hop) , My Turn ( for us) , Fun Friday Blog Hop, The Pin junkie and Let's get Social Sunday.


