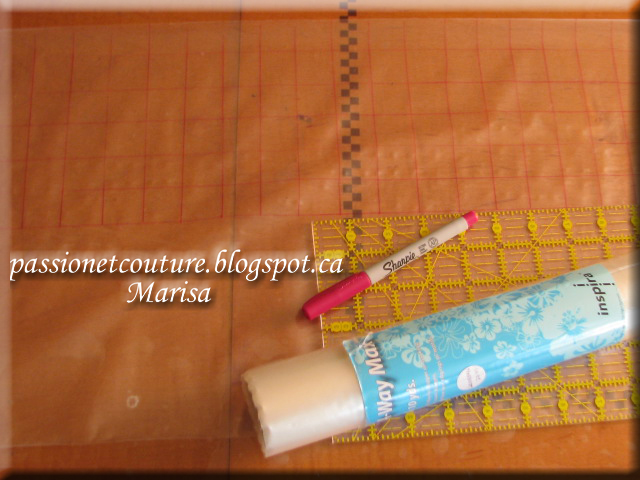
Friday, December 14, 2012

A wine gift bag for every occasion.

Each time I am invited to lunch or dinner at friends or my family, I always take with me  a bottle of wine as a gift, I think here in Quebec is the tradition (I do not know if I ever told you that my country of origin is Uruguay, I'm living in this beautiful country for the last 23 years). Returning to my theme, whenever I have the opportunity I will sew a gift bag, and each time the recipient of my bottle of wine left in admiration with the bag (do not even look at the bottle of wine) the truth is that  over the years I have made wine gift bags for all occasions, I'll just adjust my fabric selection by the event and the imagination does the rest. I thought it might interest you to see how I make my wine gift bags and here is the tutorial.


This is an easy project to do, you can do it in an afternoon and the possibilities are endless. Everything will depend on the fabric used for the outside of the bag, you can do something simple by using a print fabric or make something more elaborate such as adding an applique, an embroidery, buttons, eventually all your ideas can be used to decorate the fabric.


What we need is:
Cut:   13.5 x 13.5 from main fabric, lining and batting

Base: the pattern is here, you will cut, 1 from fabric, one from batting and one from lining. ( When you print the pattern, verify that the diameter of the circle is 4 ")
Handle: Cut a piece of 4" x 17".

I decided to make the outer fabric using fabric scraps, I think you are getting to know me better, I have to admit...  when I use my scraps, I feel happy :)
To create my piece of fabric I follow the same steps I did when I made my crazy quilt clothespin bag, here is the tutorial,


All started this way


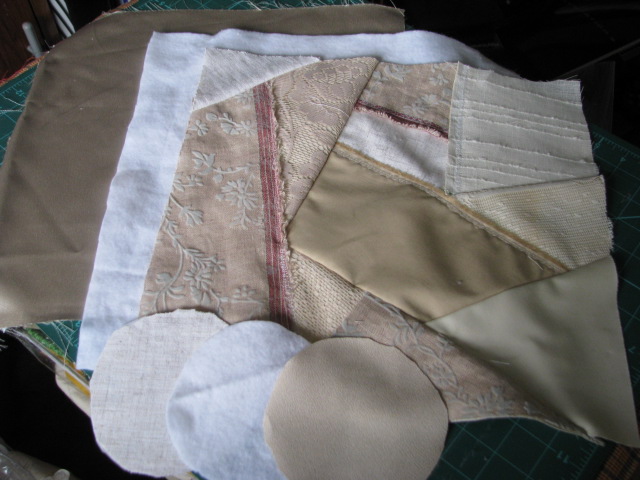
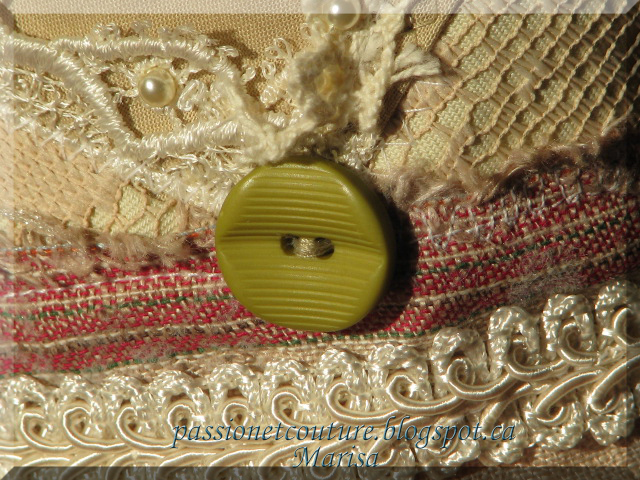
From here I started to add more details,  add buttons, beads, lace and decorative stitches...


Once I finished all the embellishment of my piece of fabric I did the handles.
If you do not want to sew handles another possibility would be to make buttonholes,


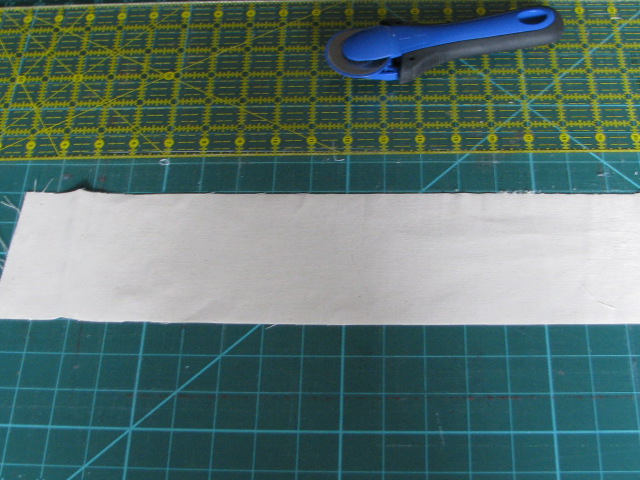
Once the piece of fabric cut to 4 "x 17"
 
Fold in half lengthwise with wrong sides together
 

Open and fold again each long edge in, to meet the center and press


fold again, press and edge stitch both edges


Pin the handle to the right side of the fabric ( I put the handle 3 "from the
edge), align the row edges of the handle with the row edges of the fabric.


With right sides together, fold the exterior fabric lengthwise in half and  sew.
 
 
before adding the base, place the base batting and the  wrong side of the


This is a photo of another gift bag I made, here you can see better the stitching I did
to attach the batting to the outer fabric
 
 
Now let's sew the exterior fabric  to  the circular base. With right sides together
pin the base to the exterior fabric and sew, using a 1/4" seam allowance.


Turn right side out


Now let's do the lining, we will follow the same steps as we did for the entire
exterior of our bag, but this time leaving 4" of the side open.


 Let's join the exterior and the lining, with right sides together, aligning the row
edges, the handle will be sandwiched between the exterior and the lining, pin and
stitch around the top edge.


Now is time to  pulling the exterior fabric through the opening
 
 
Now we sew the opening  and push the lining inside of the  wine bag.


The wine gift bag is finished, now we just have to go and buy a bottle of wine, to
fill our wine gift bag and give it to a loved one, it is certain that this will be
an appreciated gift.
"Please do not count all the times that I wrote the word "wine" in this tutorial"
 

I want to  share with you some extra photos


More wine gift bags I made


I hope you enjoyed this tutorial and  don't forget to leave me comments, you know
that your comments feed my desire to create.
 
If you are reading this post and you're not a follower, why not consider to join
us? I'm sure you will spend some  beautiful moments with us on the blog. I'm always
looking forward to making new bloggy friends!
Have a happy sewing day!
 
Marisa
I'm linking this project to Creating my way to Succes(A Round Tuit 132) , Threading My Way, Petals to Picots, Skip To My Lou, Freemotion by the River, A Quilter's Table, and to Fabric Bows and More
I'm also linking this project to The Creative Blog Hop ( dolly's designs).

Friday, December 7, 2012

My recent crochet scarves.

From all evidence the winter makes me stay in touch with the yarn and crochet
needles. In these last days I finished a scarf to give to my mom
 
 
The colors in the photo came out bluer than it really is , I don't know why.
 
This view is more closely and you can see a little more the details and the actual
colors of this scarf.
 

If you want to make this scarf,  you're going to find the printable instructions
here, and good news, the pattern is free.
 
This is another scarf I've done, I just use two crochet stitches, the chain stitch
and the double crochet stitch.
 

On the other hand, speaking of scarves, Rikka has created a page on her blog  Ricochet and Away with
all the beautiful scarves that the participants from the challenge have created.
I invite you to visit  Rikka's blog, there you will have, some beautiful scarves that will give you inspiration,
and also the links to visit the participating blogs and  free tutorials to
create these scarves, is a worthwhile visit.
 
 
This button I add here, is to take you directly to the site where  to find the scarves.  If you want to  vote for the scarf that you like more, continue
down the page  and there you will find the place to vote.
 
Thanks for visiting my blog, I wish you all to spend a beautiful day, don't forget
to leave me comments, you know that your comments feed my desire to create.

If you are reading this post and you're not a follower, why not consider to join
us? I'm sure you will spend beautiful moments with us on the blog. I'm always
looking forward to making new bloggy friends!
Have a happy sewing day! 
 
 
Marisa :)


I'm linking this project to Threading My Way  and to Creating my way to Succes( A Round Tuit 131)

Monday, December 3, 2012

My Christmas table runner.

We are in the month of December and I started to prepare my home for Christmas.
I want to show you this table runner that I made a couple of years ago and that
decorates my table every December since.


 To make this table runner I used my embroidery machine and the embroidery card
"Crazy Patch Embroidery" from Husqvarna ( Embroidery disk number 130).
To do it, I chose one of the pictures of the card and I embroidered several times, always repeating the same pattern and
using the same colors of fabrics. Then what's left to do is sew them together to
create the design.


Hope you like it and that I have given you the inspiration to create one like this
for your home, or maybe make one to give to a loved one.


Have a happy sewing day!
 
Marisa.

I'm linking this project to Creating my way to Succes(A Round Tuit 130), Sew Chatty, and to  Skip To My Lou

Wednesday, November 28, 2012

Let's make a scarf using water soluble stabilizer, threads, ribbons and yarn.

This month Rikka from Ricochet and Away is hosting another challenge, this time the challenge is to make a scarf. There are several guide lines to respect in order to participate in this challenge, that's what I like!
One thing is certain again: in this challenge  I will be out of my comfort zone, I love this!
While there are several guide lines  to respect, I'll just mention two of them, because for me, it is these conditions that led me to think about the kind of scarf that I will create.
 
 
# While crocheted and knitted scarves are wonderful, they will not permitted as
entries.
# You must try something new when making your scarf
 and be specific about what you tried.
 
From here I tried to think of something that I have not done until now, I
remembered a technique where we could create a fabric using water soluble
stabilizer, wool, yarn and fabric scraps, and then we can create a scarf.

My project ended well, here I show you the pictures of my finished scarf:


Rikka  has added a variety of links and photos to create scarves, if you look for
inspiration, I invite you to visit her blog, this is the link. Look also in the
previous post, you will be surprised of all the possibilities that exist to make
scarves.
If you still want more inspiration, there is a board  on Pinterest, where you will find all kinds of scarves, this board was created for this challenge, this is the link.
 
If you wish to participate in this challenge there is time until 30th November for
register  and to do the project, here I added the botton for the challenge, you
just have to click on the site and you will go directly.


I took pictures while I was doing this scarf with the idea of creating  a tutorial
for you, maybe someone in this cybernetic world wants to make a scarf like this, I
think that a scarf  can be a nice Christmas present for a loved one.
 
Let's get started, not many materials are required for this scarf, the base is the
water soluble stabilizer, I used Dissolve-A-Way Max, is the one I had on hand and
gave me very good results when it was time to rinse my scarf to dissolve the
stabilizer. We also need thread, yarn, ribbon and wool, in reality you will choose
the materials after you see the technique.

These were my materials to start
;
 
 
To begin I cut 60 "length of water soluble stabilizer and with a fine line
permanent ink marker I drew lines to create a grid in only half of the stabilizer,
in my case the stabilizer is 12 "wide, this means that my grid is 6" wide.  I used
this grid as a guide for my sewing


I Took the first fiber (do not know what to call it, it is not wool), I used the 
Cord foot, using the same color thread in the bobbin as on top, I scheduled my
running stitch to a length of 2.0 and started sewing. The first thing I did was
leave  a length of about 6 "away from the edge and start sewing the fiber along the
 grid, alternating materials, sometimes a fiber, sometimes the ribbon.

I forgot to tell you that I used a universal sewing needle, number 80.


Then I started to sew the ribbon widthwise, I did one side and always leaving the
needle down, I was turning the stabilizer to go from side to side always following
the grid.


Now I fold the water soluble stabilizer in half  and place it over the scarf.


Then, I turned my scarf to keep in front of me, the side that has the stitching.
 
Always using the same color thread in the bobbin as on top, I added decorative
stitches, you can include several lines of sewing, it is important to fill in your
grid squares. You have to overlap the stitches to hold them together.
 

added more yarn at the end, trying to fill all the spaces

 
finally place the scarf  in water to dissolve the stabilizer,
 
 
then set it to dry, I place it on a towel to let it dry overnight. Here it is ready to be used
 
 
The result will vary from one scarf to another, depending on
 the variety of colors, textures, thicknesses of the yarn that we will use that we use,  there is an expression that I really
like and it is, what if? and in this project I asked myself that question all the
time.
 
I hope you have enjoyed this project and I also hope to receive your comments, if
you liked this tutorial, I invite you to become a follower of this blog, and for
those who already are following me, I say thank you for following me on my
adventure.
 
Have a happy sewing day!
Marisa :)


I'm linking this project to Threading My Way, Creating my way to Succes, Skip to My Lou, Sew Chatty , delicate CONSTRUCTION, Mine for the Making, Make It War It, The Chicken Chick( Clever Chicks Blog Hop #15) and  Trendy Treehouse.

Sunday, November 25, 2012

What is a blog hop?

A year ago I started this blog and since then I am always learning something new, lately I discovered something new to me, is the world of "blog hops".

In my search for information I found a site where this is well explained, is Linky Tools, at that site they explain the following;

-A blog hop is a linky list that is shared on multiple blogs.
-When several blogs put the same linky list code on their blog, the exact same list appears on each blog.
-Blog visitors can submit their entries on any blog that contains the list. The
entries will appear on each blog where the list resides.
-Blog readers see the same list on each blog, and can "HOP" from blog to blog seeing the same list of links to follow: BLOG HOP!

If you want more information this is the link.

I think that it's a great way to discover new blogs and maybe to find new bloggy friends.
It was while visiting the blog of my great friend  Maria, that gave me the curiosity to find out more about this topic. There are now some blog hops that interest me and that I want to share with you.

There is a blog hop already started on 21 November and that runs until 30 November the participants are making some  beautiful pillows, I will add here the button


I was surfing online from one blog to another trying to  find the pattern to do this pillow, until finally I found it here , at the site of Jillily Studio.


The other blog hop is this;


To find the various tutorials to make pouchs you have to go to the Flickr group,
the link is near the bottom of her post. When  you are on the Flickr page, you will
find under the photos, a blue text that says Recommended tutorials, click there and
you will find several tutorials to choose from.
If you want to make a pouch, this is the place to share your creations.


Finally there is another blog hop and the information is on the site of Daryl, a dear bloggy friend, is in Patchouli Moon Studio's blog. This blog hop is in December, this is the link I invite you to visit her blog for more information, I also want to mention that Daryl will give a giveaway when she reaches 300 followers, and only is missing one!


There are still things I do not understand, one of them is how sign up to
participate, perhaps there is someone that can give me a little more information
about how this works.
Meanwhile I'll do the Holiday Lane Pillow  and I will enjoy the beautiful creations
made by the participants.
 
Have a happy sewing day!
 
Marisa.


Friday, November 9, 2012

The Exchange Bag.

I don't know if the same thing happens to you, but I've collected a amount of patterns bags. I have a fold on my computer that I named it bags, in that folder, I have  free patterns that I found online and other patterns that I bought and to complete this collection I've created a board on Pinterest with photos and tutorials of bags that I like.

Ok, the problem I have now is that when is time to decide which one to do,  I don't know where to start, because I like them all!

Last week I decided to make a bag for the winter, which begins soon here in Québec, so I started to look for a pattern, I have a huge collection as you know. After huge reflections, I decided to make this bag.
 
I love the shape of this bag, The finished dimensions of this bag are:
Heigth 9 inches (23cm)
Width 14 inches (36 cm)
Base 4 inches (10 cm)

I have to admit that this  bag is easy to do, this is a downloadable pattern, and  the explanations are clear. This bag has a shaped pocket at the front and back, and an inside pocket. It is
made from 3 contrasting fabrics ( I used just two fabrics) which allows us a great freedom to combine different fabrics, colors and textures ,and has a gusset base.


I bought the pattern for this purse on Etsy, this is the link if you are interest.
 
style.
 
 
If you ask me, if I advise you to do it, I'd say yes because it was easy for me to do it. All you have to take into consideration are the measurements of the bag, if
what you want is a not very large handbag, this is an ideal handbag for you.
I hope you liked it and that you have discovered a new model of bag. Do not forget
to leave comments, I always like to know your opinion and I'm happy to answer your
questions.


I'm linking this project to Threading My Way, One Artsy Mama , delicate CONSTRUCTION , Happy Hour Projects , Sarahndipities , Sew Chatty , Creating my way to Succes , Positively Splendid  and Petals to Picots.


Have a happy sewing day!
Marisa

Saturday, November 3, 2012

.....and the winner of the challenge is ...

I don't know if you remember the cushion I made in September to participate at The Sewing Fold Fab Challenge. The challenge consisted in Successfully execute pleating, pin-tucking and / or smocking in a finished piece.


Here is the project that I did to participated to the challenge, a Canadian smocked pillow.


All entries were beautiful, each project had something unique and beautiful.
If you want  to see all the challenge entries click here.
 
After a whole month of voting, I received the results of the challenge, and the
 
 
I have the joy to announce that the project that has received more votes was my
Canadian smoked pillow.
I want to thank everyone who voted for my smocked pillow and I want to share with
you, the lovely gold badge I received.
 
I will take a minute of your time to let you know that there is a new challenge.
The challenge this month is to make a scarf, if you are interested in the


See you soon with my new projects and tutorials, thank you for your visit.
Have a happy sewing day.
Marisa.


LinkWithin

Related Posts Plugin for WordPress, Blogger...