Thursday, July 18, 2013

My Ruffled Lacy Shrug.

Is not beautiful?
 
No es hermoso?


I found this pattern in my search for something original where I could start
creating something, combining knitting and crochet. It is not free form, but for
me, this shrug  starts to look like a free form creation. I found this project on Etsy, here


Encontré este patrón en mi búsqueda de algo original, buscaba un proyecto donde
pudiera empezar a crear combinando el tejido y el crochet. No es free form,
pero desde mi punto de vista , esta pieza empieza a parecer a una creación free
form. Este proyecto lo encontré en Etsy. Aqui esta el enlace.


Discovering this Etsy shop was exciting for me, I found something else, it's
true, not everyone has the same tastes and we do not have the same style, but to
me, particularly I enjoy every creation of this shop.

The pattern was designed by the fiber artist, Janice Rosema, and is for sale
in the "simple patterns" Etsy shop. I did not use the yarn they recommend, but
I used  one that I like a lot, is the Amazing yarn  from  Lion Brand .
I leave here a link to the Lion Brand site, so you can see  the wool that I used


El descubrir este Etsy shop fué estimulante para mi , encontré algo distinto, es
verdad , no todos tenemos los mismos gustos y tampoco tenemos el mismo estilo,
pero a mi, en particular me gustan todas las creaciones de este shop.

El patrón fué diseñado por la artista Janice Rosema y el patrón esta a la
venta en
"simple patterns" Etsy shop. Yo no usé la lana que ellos recomiendan,
pero use una que se parece mucho, es la lana Amazing de Lion Brand.Les dejo aquí un enlace hacia el sitio de Lion Brand, para que ustedes vean la
lana que usé


This shrug is made by combining two techniques knitting and crochet, but there
is a version on the pdf to do it only in crochet.
I did some modifications at the end, but that's the beauty, give the personal
touch. I decided to add a brooch, this flower says something to you?
 
 
Este shrug se hace combinando dos técnicas tejido y crochet, pero hay una
versión para realizarlo solo en crochet.
Yo le hice algunas modificaciones al final, pero eso es lo lindo, darle el toque
personal. también  decidí agregarle un broche, esta flor les dice algo a
ustedes ?


I found this photo original, as it enables you to see who is behind the camera
taking photos.
 
Esta foto la encontré original, pues les permite ver a ustedes quien esta
detrás
de la cámara  tomando las fotos


Before concluding this post I want to let you know that I have no affiliation
with Lion Brand or with the "simple patterns" Etsy Shop. I just want to share
with you the materials and the pattern that I used to make my shrug.
When I bought this pattern I asked permission to the shop owner  to use  a photo
of the original pattern  on this blog, and she accepted.
 
Here I show you the original pattern. 


Antes de terminar esta publicación les quiero dejar saber que no tengo ninguna
afiliación  con Lion Brand ni con the "simple Patterns ". Solo quiero compartir
con ustedes los materiales y el patrón que usé para realizar mi shrug. 
Cuando
compré este patrón le pedí permiso a la propietaria  del shop para usar en este
blog ,  una foto de el patrón que yo compré y ella acepto.
 
En la foto que esta aqui arriba  les  muestro el
patrón original .

Aqui esta mi creación!
Me encanta, estoy deseando que la
temperatura baje un poquito para poder usarlo..


Here is my creation!
I love, I'm hoping that the temperature drops a little to use it ....


Hugs!
Marisa 


Sunday, July 7, 2013

What to do with pearls, beads and wire.

Well....using pearls, beads and wire, we can create a number of accessories, today I
want to show you a necklace, a bracelet and a ring I made to give to my
mother in law.


Que hacer con perlas, cuentas   y alambre ?
 
Usando perlas, beads y alambre, podemos crear una cantidad de accesorios , yo
hoy  quiero  mostrarles un collar, una pulsera y un anillo que hice para regalarle
a mi suegra.


I visited one of my favorite stores, Club Beads Plus in Montreal, I felt like a
kid in a warehouse of toys! I bought enough material to start creating something
 unique, the store is in Montreal but has an online site, if you want to visit this is the link.

As I decided to give a ring , a bracelet and a necklace to my mother in law,
this was a good excuse to go shopping. I don't know if you would feel the same
as me, but when I have an excuse to buy, I feel less guilty to go shopping!


Estuve de visita en uno de mis almacenes favoritos, Club Beads Plus en
Montreal, me sentí como un niño en un almacén de juguetes! Compré bastante
material para empezar a crear algo unico, haber decidido a  hacerle un anillo , un collar y
una pulsera  a mi suegra  fué un buen pretexto para salir de compras.
la tienda Club Beads esta situada en Montreal pero tiene un sitio online, si lo quieren visitor este es el enlace
Yo no sé si a ustedes les pasa lo mismo que a mi, pero cuando tengo una excusa para comprar, me siento menos culpable !!!!!


I'm really a beginner in this topic and the person responsible for my new
passion for creating jewelry is my mother in law. Since long ago I see her
create jewelry of all types and give them as a gift, and a couple of months ago
she began teaching me the basic principles of creating these pieces .
 
To create these pieces I used pearls and wire, the pearls that I used for this
necklace are glass pearls 12mm in diameter and in gray color. I didn't know
which wire to buy to make the ring, I asked one of the employees and advised me
to use 18 gauge wire.
To make the ring I watched several videos on you tube, this is the link to one
of them. If you write " How to do  wire rings" on you tube, you will be amazed
at all the tutorials that are available online 


En realidad soy una principiante en este tema y la persona  culpable de mi nueva
pasión por crear joyas   es mi suegra ( Hola Pepi). Desde hace tiempo que yo la
veo crear joyas de todo tipo y darlas en regalo, y   hace un par de meses que
ella me comenzó a enseñar los principios de base de la creación de estas joyas y aquí
estoy mostrando a ustedes  lo que  he creado.
 
Para crear estas piezas usé perlas, cuentas  y alambre,  las perlas que yo usé para este
collar  son perlas de vidrio de  12mm   de diámetro y de color gris,. Yo  no
sabia cual  alambre comprar para hacer el anillo, le pregunté a una de las
empleadas y me aconsejo de usar alambre calibre 18.
Para hacer el anillo estuve mirando varios videos en you tube, este es el enlace
hacia uno de ellos. Si ustedes escriben Como hacer anillos de alambre" en
you tube, se van a sorprender de todos los tutoriales que hay disponibles online.


Hope you like my creation, I have intended to write a tutorial to show you how I
make these necklaces, they are easy to make when we have taught the technique
and the tools needed. These tutorials are on my list of things to do for the
blog, you can not imagine how long it is my list, but gradually I will show
things that I finished.

Thanks for your visit, I love to receive your comments, now back to my passion

..... "create", I think I would have to be called my blog, passion and creation,
I discovered that I love to create with everything that falls into my hands and
I love it!


Ojala les guste mi creación, tengo como objetivo de escribir un tutorial para
mostrar como hago los collares, son fáciles de hacer cuando nos han enseñado la
técnica y los útiles necesarios . EStos tutoriales están en mi lista de cosas a
hacer para el blog, no se imaginan lo larga que es mi lista, pero poco a poco
les voy mostrando cosas que voy terminando.
Gracias por vuestra visita, me gusta mucho recibir vuestros comentarios, ahora

de vuelta a mi pasión....."crear" ,  creo que yo tendría que haber llamado mi
blog , pasión  y creación,  he descubierto que me encanta crear con todo lo que
cae en mis manos y me encanta!


Monday, July 1, 2013

My knitted hat!

I made my first knitted hat, I am so proud that I  have completed this project.
Obviously I could not do it alone, so far the only thing I can do with two knitting  needles  , is  make scarves, but this time I took it as a challenge and I did it!

 
I have a bloggy friend who always inspires me with her creations, this friend 
is  Daryl from the blog "Patchouli Moon Studio",
 I invite you to visit her blog where you will find much  inspiration.
It was admiring her beautiful creations
that I decided to take an online course.

 I like particularly Craftsy courses, so I signed up to the course  from  Stefanie Japel, Hats Four Ways and following her class,
 I managed to make this hat!


Hice mi primer sombrero tejido con dos agujas, hace tiempo que queria hacer uno asi,y les puedo decir que  me siento orgullosa de haber terminado este proyecto.
 
Evidentemente no lo pude hacer sola, hasta ahora lo único que he
podido hacer usando dos agujas, eran bufandas, pero esta vez lo tomé como un desafío y lo hice!
Les gusta?
 
Tengo una  amiga blogger que siempre me inspira con sus creaciones y es Daryl de el blog "Patchouli Moon Studio", los invito a visitar su blog donde encontraran un monton de inspiración.
 
Fué admirando sus hermosas creaciones que me decidí a tomar un
curso online. A mi me gustan en particular los cursos de Craftsy, así que me
inscribí al curso de Stefanie Japel , "Hats Four Ways" y siguiendo sus
instrucciones, logré realizar el sombrero que estan viendo.


I have no affiliation with Craftsy, but I am a satisfied customer. Still not finished watching all the videos of this course, I thought it would be easier for me to focus on making a hat at a time, so watching the first videos I finished my "Sweet Pea Hat"


No tengo ninguna afiliación con craftsy, pero soy un cliente satisfecho.
Todavía no terminé de ver todos los videos de este curso, pensé que seria mas
fácil para mi concentrarme en hacer un sombrero a la vez, así que mirando los
primeros videos logré terminar mi "Sweet Pea Hat".


I learned to knit with circular needles, this is something that for me was
always a mystery and learned to make decreases, this was an adventure for me!.
I'll give you the link where you will find more information about this course,
the link is here. In this link you will find the page where are the knitting
classes, the course that I took to make this hat is the "Circular knit lab, Hats
for ways" from Stefanie Japel.


Aprendí a tejer con agujas circulares,esto es  algo que para mi siempre fué un
misterio y aprendí también a hacer disminuciones,
esto fué toda una Aventura !.

Les voy a dar el enlace  donde ustedes van a encontrar  mas información acerca
de  este curso , el enlace esta aquí. En este enlace  ustedes van a encontrar la
pagina donde están las clases que muestran proyectos de tejido.
El curso que yo tomé para hacer este
sombrero es el  "Circular knit lab, Hats for ways" de Stefanie Japel.


Hope you like my hat, I finished it in summer so I'll leave it ready for use
within a couple of months, in the meantime I'm doing more creations with wool
and  jewellery projects.


Since I started this blog I learned a variety of techniques and I always try to
find something new to share with you. One of the things I'm learning now to do
is Free Form! Has anyone heard of this? It's Fascinating, using crochet,
knitting and create freely, without patterns, the total freedom.
  I started to create something , in free form is called "Scrumbles" . I will
give you my pinterest board , there,  you  will find some creations  made ​​in free
form, you will have an idea of ​​what I'm doing now.
 Here is the link!

On the other side  my daughter is on vacation now and she told me that she wants to learn to make
necklaces, bracelets and rings. for this reason I am doing some creations with
her, learning at the same time and  I hope that I will show on future posts 
what we have done so far.


Ojala les guste, yo  terminé este sombrero  en verano así que lo dejare pronto
para usar  dentro de un par de meses, entre tanto estoy haciendo otros proyectos usando lana y estoy creando joyas.


 Desde que comencé este blog he aprendido una
gran variedad de técnicas y siempre trato de descubrir algo nuevo para compartir con ustedes.

Una de las cosas que estoy aprendiendo actualmente a hacer es Free Form!!
Alguien ha escuchado hablar de esto? Es fascinante , usar crochet, tejido con dos agujas y crear libremente, sin patrones, la libertad total.

He empezado a crear lo que en free form llaman "Scrumbles", les voy a dar mi board de pinterest donde van a encontrar creaciones hechas en free form, ustedes van a tener una idea de que estoy haciendo ahora.
Este es el enlace

Por otro lado  mi hija ahora esta de vacaciones y ella me  dijo que quería
aprender a hacer collares , pulseras y anillos,  por lo cual en este momento
tambien  estoy haciendo algunas creaciones con ella, en los próximos post 
espero poder mostrarles  a ustedes lo que hemos realizado hasta ahora.


See you soon.
Nos vemos pronto.


Marisa


I'm linking my project to Sew Darn CraftyThreading My Way, The Chicken Chick, Monday Funday at Mel's Daisy Patch Crochet , Clippie Dips, Memories by the Mile,  Trendy Treehouse ( Create and Share), Fluster's Creative  Muster, My Turn ( for us) , The Hibiscus House, and  Inspire Me Monday.

Tuesday, June 18, 2013

Recycled Cans "Round 1" .

From long time ago I want to do a recycling project for the blog, lately I
started to collect some cans. I chose those cans we buy in grocery stores and
usually bring inside, tomatoes, soup, a bit of everything, you know which are
the cans I'm talking about.
My idea was to get several cans of different sizes but I started with what I had on hand.
 
I call this tutorial "Round 1", because I think I'm going to recycle more cans
in the future and would be interesting to do a round two and then a three, it
would be interesting to see all that I can create, back to putting feet on land...
 I begin by round 1.


Desde hace tiempo que yo quiero  hacer un proyecto de reciclaje para el blog,
últimamente empezé a juntar algunas latas.  elegí  esas latas   que compramos en los supermercados  y que normalmente traen en su interior , tomates, sopas, un poco de todo,  ya saben cuales son las latas de las que  estoy hablando.


 Mi idea era conseguir varias latas, de diferentes tamaños , pero bueno empezé con las que tenia a  mano .  Decidí dar el nombre de "Round 1" a  este tutorial  , pues pienso que voy a reciclar mas latas en el futuro y seria interesante hacer un round dos y luego un tres, seria interesante ver todo lo que puedo crear, pero volviendo a poner los pies sobre la tierra, empiezo por el round 1!


Doing this project I discovered that there are two types of can opener, the
first group that cut the can, horizontally, and leaves a sharp edge. The other
opener that cut vertically, leaving a perfect edge for our projects.

Do you see the  green tape that you see over the edge? I put it to protect me from the sharp edge, when I started this project the only can opener I had was the one who cuts horizontally.
That's the green tape for painters, is usually used to protect
areas that do not want to paint, and I thought to use it as it has an adhesive
side.


Descubrí haciendo este proyecto que hay dos tipos de abre latas , el primer
grupo que corta la lata, de manera horizontal, y que deja un borde filoso y bien peligroso.

Los otros abrelatas que cortan en forma vertical, dejan un borde perfecto para
nuestros proyectos.


La cinta verde que ustedes  ven sobre el borde, la puse para protegerme de el
borde filoso, cuando comenzé este proyecto el único abrelatas que tenia era el
que corta horizontal. Esa es  la cinta verde que usan los pintores , es la  que
generalmente usamos para proteger las zonas que no queremos pintar, y se me
ocurrió usarla pues tiene un lado adhesivo.


The cans must be well washed, dried and sanded to create a rough surface where the paint can adhere.
After sanding, I decided to use a sealant, I used a
product called "Liquitex medium" is a material that is used to prepare surfaces
in my case gave me the grip I wanted. I was afraid that after the paint was dry,
becomes detached from the can. I got the "Liquitex" at a store called
"Michaels", it exists in several places but can be found in any store that sells
materials to make crafts.

When the sealant is dry, paint with white acrylic paint. After the paint is dry,
we can start decorating.

 
Las latas tienen que estar bien lavadas, secas y lijadas, para crear una
superficie rugosa donde la pintura se pueda adherir. luego de el lijado,
decidí usar un sellante, usé un producto que se llama "Liquitex medium". Este  es un material que se usa para preparar las superficies, en mi caso me dio la
adherencia que yo buscaba.

Yo tenia miedo que luego que la pintura estuviera
seca , se despegara de la lata. Yo conseguí el "Liquitex" en una tienda
llamada " Michaels ", se que existe en varios lugares sino la pueden encontrar
en cualquier tienda donde vendan materiales para hacer artesanía.


Cuando el sellante esta seco, pinte con pintura acrílica blanca, luego que la
pintura está seca, podemos comenzar a decorar


I made several cans, I'll show you pictures of them. Then I will show pictures
of the steps I did to make one, let's start with the photos of the finished cans .

Hice varias latas y les voy a mostrar algunas fotos que tomé de ellas, mas
adelante les voy a mostrar fotos de los pasos que hice para decorar una de ellas.


Here I'll  show you the steps that I did  to make the decoration of this tin.

Aqui les muestro las etapas que hice para decorar esta lata


After the white paint was dry, I added a light blue color paint.


Luego que la pintura blanca estaba seca , agregué una  pintura color celeste .


I have put on the table, all the objects that I liked and that I could use to decorate.


Pusé sobre la mesa,  todos los objetos que me gustaban y que podria usar  para
decorar .


First item, jute and hot glue gun.

Primer elemento, jute y pistola de cola caliente


I love this butterfly!

Me encanta esta mariposa.


I would like to add a detail on the edge of the can.

Me gustaria agregarle un detalle en el borde de la lata.


...the final touch was the blue button.

El toque final fue el boton azul.


To decorate the other cans  I   used jute, burlap, glued paper, fabric, ribbons
I also used a wooden heart, fabric flowers ... everything is in the imagination,
and do not forget to save the next cans and recycle them .... because it's
beautiful!


Las otras latas yo las decore usando jute, burlap, pegué papel, tela , también
use Cintas de tela, un corazón en madera, flores en tela...todo esta en la imaginación,
y no se olviden de guardar las próximas latas y reciclar, pues es hermoso!


I'll have to create a new page with the name CRAFTS, where to put these
creations that are not in fabric, nor in wool but from a varied origin
Hopefully you enjoyed this post, by my side I enjoyed this creation and was a

nice experience to write this tutorial for you.


Voy a tener que crear una nueva pagina con el nombre CRAFTS , donde poner estas creaciones que no son ni en tela, ni en lana, sino de  origen variado.
Ojala hayan disfrutado de este post , yo por mi lado disfruté de esta creación y
fué una linda experiencia la de escribir este tutorial para
  ustedes.


This was my first post in English and Spanish, I hope you liked it. I'm looking forward to reading your comments, see you soon.


Este fué mi primer post en inglés y español, ojala les haya gustado. Estoy deseando leer vuestros comentarios, nos vemos pronto.


Marisa :)


The links you see above are there because I'm participating in  the  DIY Tuesday  form Adriana's blog, "is a blog carnival
started by Adriana Home-Woman and to participate you only have to link each
Tuesday a " DIY  project "(which means you should do it yourself) then just add
the linky below and let a comment on each blog participant. to know how it

Friday, June 7, 2013

Let's do a Ruffle Tote .


After a week, it is only today that I have been able to raise this second part of the tutorial.
Prepare the post it takes time, especially when it's a tutorial.
Maybe you're not going to believe me, but every time I write a post, the first thing I'll do is write all my text in Spanish and then, translate it into English.


In my previous post that you'll find it here, we finished the exterior of the tote and the handles. Also in another previous post, I showed how I made the fabric flowers, the link is here. Today we will continue with the rest, that is, make the lining and see how we do to attach the lining and the handles to the outer fabric of the tote.


Create a label
 
Before we start I want to tell you something, one of the things that I was trying to do last week was, make labels to add to my projects, I made many tests, I took several photos and I have the intention to prepare a tutorial to show you how to do custom labels.
Today I'll show you what I decided to do, although I created several varieties of labels, after several attempts, trying to make labels for this tote, I decided to do a transfer of my label directly to the fabric, instead of making the transfer to a ribbon and then have to sew it into the tote.
Look how it turned out.


Prepare the lining

The liner measures the same as the outside, for my tote I used  the following
measures:


I cut

 1 (14 x 36" ) exterior fabric, so...
 1 (14x 36")   for the lining.


The lining can be made ​​simple without pockets.
For my tote I decided to add two
types of pockets, on one side, I added a pocket  with a metal closure.


On the other side I did something simple like this.


Pin lining right sides together, aligning row edges  and sew together, leaving
7" of one side open
Don't sew the upper side


Attach the handles to the exterior fabric

In my previous post we saw how to do the handles, I finally cut them and the
final measure is 27 "long,


At this time, I'll put the two handles on the right side of the tote.

Usually, at this moment, I'll  sew by hand the handles , I use basting stitches, just to be sure that they will not move on the next steps.

With right sides together place the exterior fabric, inside the lining.


Aligning the row edges, pin,  and sew together
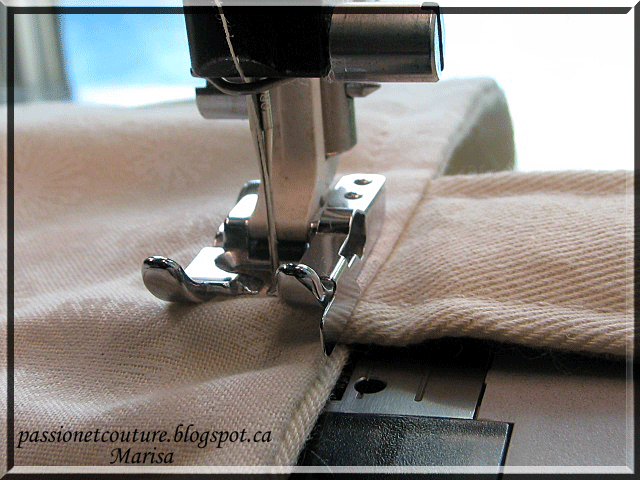
sew along the top edge of the tote, I did several rounds with the sewing
machine, a first seam 1/2 "from the edge, other seam closer and another 3/4"
from the edge. This part is where you have the handles and it must be really
hard.


Turn right side out by pulling the exterior fabric through the opening


We have to sew the opening by hand or with the sewing machine.


Place the lining inside the tote, and topstitch through all layers! 


Add the fabric flowers


At the end I added the flowers fabrics, I could not decide which one.


I finally decided to add the two, the back side of these flowers have a brooch,
so that we can put one or the other, according to the mood of the day.


We did it!


I want to tell you something, I have wanted to open an Etsy shop for a while, I
said to myself that if I could create 10 items I will do it, ok this is just the first.

 This ruffle tote is my first item for my future Etsy shop, yes!!! 


I just hope that my dream comes true this year!

I would like to do, necklaces, bracelets and wool accessories such as hats and
scarves. I have a goal, I have ideas , but what I'm missing is always time!!!

 But there is always a beginning and for me to have finished this ruffle tote is the beginning, I have other projects already begun, apart from a number of ideas that I'll share with  you all ,
 in the next posts.

For today, I just wish that you have enjoyed my explanations, I tried to do the best that I can.

 I will be waiting anxiously for your comments, it is a pleasure for me to read every one of your comments! Thanks for your visit, I hope you come back soon!
 Greetings to you all.
Enjoy!


Marisa.


I'm linking this project to  Mod Vingtage Life, Creating My Way to Success,  Threading My WaySew Many Ways,  Dolly's designs ( The Creative Blog Hop), The Chicken Chick, One Artsy Mama( Shine on Friday) , Sew Chatty ( Made With Love), Pieced Pastimes, All  Things Pretty , Petals to Picots, Dear Creatives, Happy Hour Friday, Crafts a la mode, Inspiring Creative Moments  and Sew Crafty Angel .
I'm linking also to Plucky's Blog Hop , Night Owl Venting ( Blog Hop) , My Turn ( for us) , Fun Friday Blog Hop, The Pin junkie and Let's get Social Sunday.


LinkWithin

Related Posts Plugin for WordPress, Blogger...